
An Audience is a named combination of one or more User Groups that Creators select when targeting published content. Instead of picking individual Groups every time they publish, Creators choose a pre-configured Audience — for example, "All Staff" or "Production Floor" — and Content Hub delivers the content to every device and user in those Groups. Audiences are managed at Settings → Audiences and can be scoped to one or more Spaces.
Prerequisites
- Account Type: System Administrator.
- At least one User Group must exist before you can create an Audience. Confirm that the Groups you want to target are already configured under Settings → Users → Groups.
- If the tenant uses multiple Spaces, decide which Space(s) each Audience should serve. An Audience without a Space assignment is available across all Spaces.
Procedure
Step 1 — Open Audiences
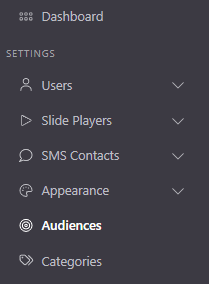
In the Settings left navigation, select Audiences.
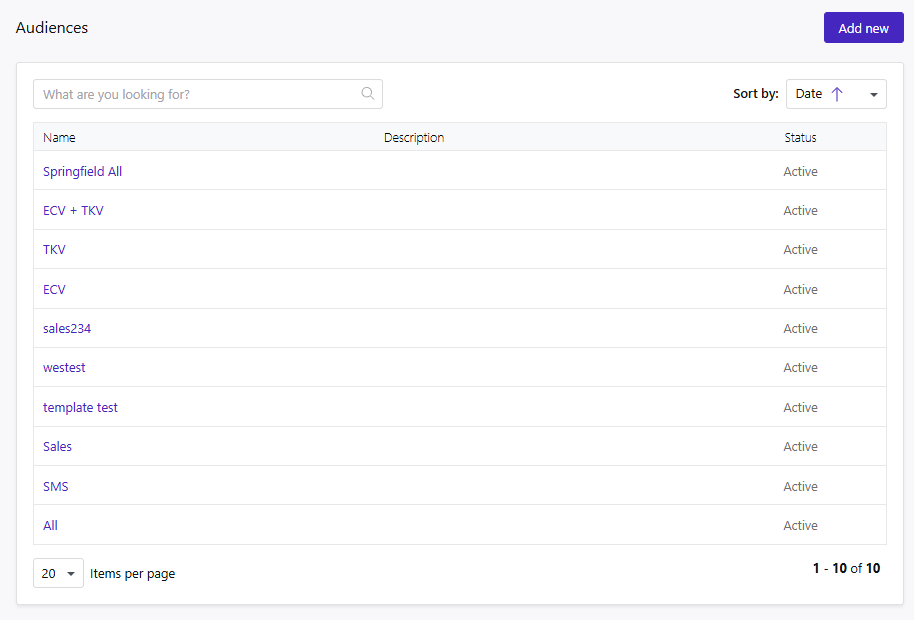
The Audiences list opens. Each row shows the audience Name, Description, and Status (Active / Inactive). Use the What are you looking for? search box to filter by name, and the Sort by dropdown to change the sort order (default: Date).
Step 2 — Create a new Audience
- Select Add new in the top-right.
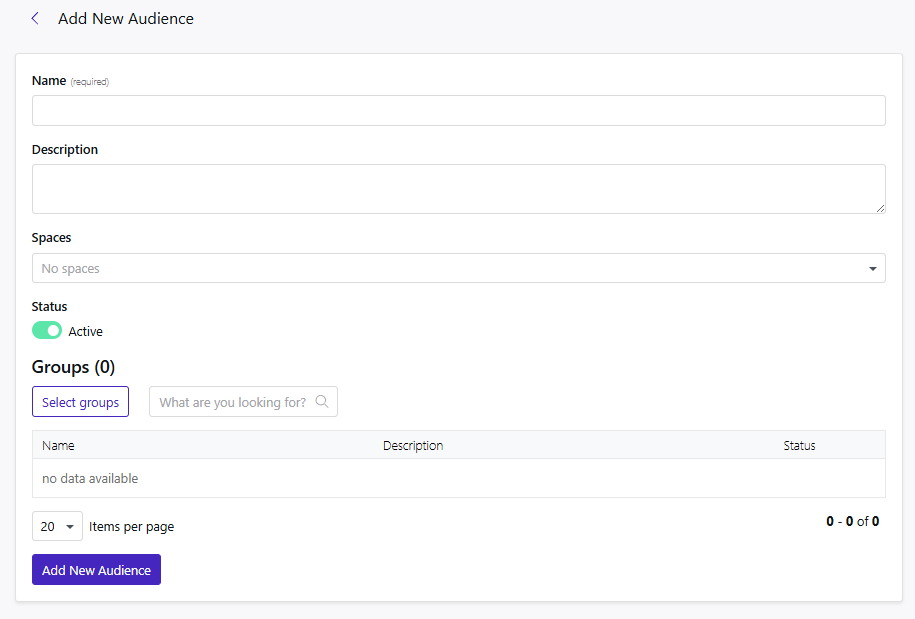
- The Add New Audience form opens. Fill in the fields:
Field Required Description Name Yes Display name shown to Creators in the targeting step (e.g., All Staff,Production Floor).Description No Optional note explaining which employees or devices this Audience covers. Spaces No Restrict this Audience to one or more Spaces. Leave empty to make it available in all Spaces. Status — Toggle: Active (default) / Inactive. Inactive Audiences do not appear in the targeting step for Creators. - Under Groups, select Select groups.
- The Select groups picker opens. It lists all available User Groups with their Name, Description, and Status. Use the What are you looking for? search box to filter the list.
- Select the checkbox next to each Group to include in this Audience. A Group can appear in multiple Audiences.
- Select Done to confirm the selection. The Groups counter updates (e.g.,
Groups (3)). - Select Add New Audience to save.
Heads up: Only Groups with Status: Active deliver content to their members. Including an Inactive Group in an Audience does not cause an error, but those members will not receive the targeted content until the Group is reactivated.
Step 3 — Edit an existing Audience
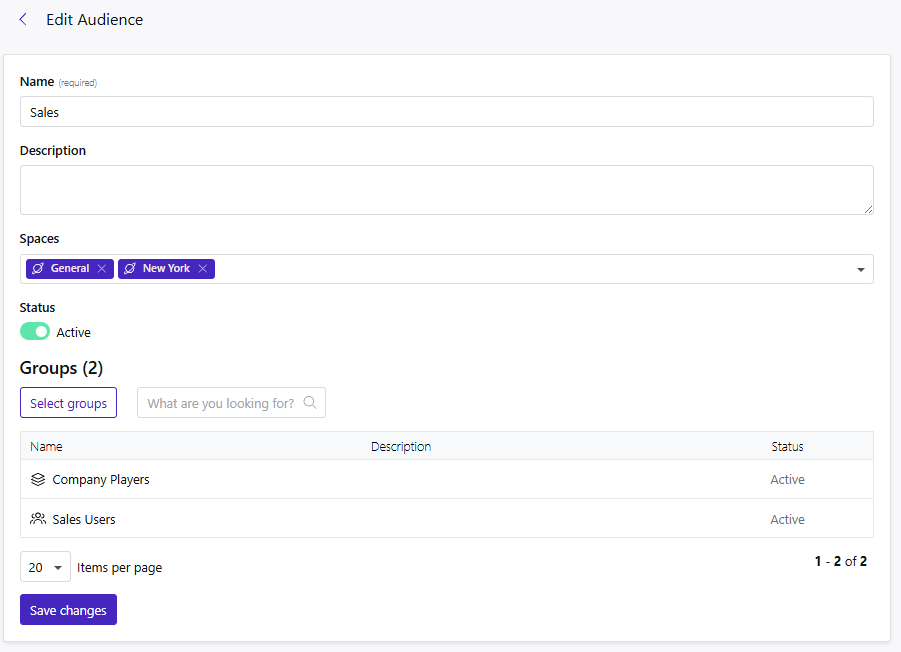
Select an Audience's name in the list (or hover the row and select the Edit icon) to open the Edit Audience view.
All fields from Step 2 are editable:
- Update Name, Description, or Spaces and select Save changes.
- To add or remove Groups, select Select groups, adjust the selection, select Done, then Save changes.
Important: Removing a Group from an Audience takes effect immediately for all new content published to that Audience. Content already delivered is not recalled.
Step 4 — Deactivate or delete an Audience
- Deactivate: open the Audience's edit view, toggle Status to Inactive, and select Save changes. The Audience is hidden from Creators in the targeting step but retained in the system. Reactivate it at any time.
- Delete: hover the row and select the Delete icon. Deletion is permanent. Content already published to this Audience is not affected, but no new content can be targeted to it.
Important: Before deleting an Audience, check whether any scheduled or recurring content items are targeted to it. Update those items to use a different Audience before deleting.
Verification
After creating or editing an Audience, confirm it is available to Creators:
- Return to the Audiences list and verify the Audience shows Status: Active.
- As a Creator (or in a test Publisher account), open the targeting step when publishing a Slide or Article and confirm the Audience name appears in the list.