
A Space is an organizational unit that segments your Content Hub environment into distinct publishing areas — each with its own publishers, categories, audiences, default slide settings, and optional custom branding. Content created in one Space is independent of content in another, allowing a single tenant to serve multiple locations, departments, or brands without overlap. Spaces are managed at Settings → Spaces.
Common examples: a Space per office location (New York, Springfield), a Space per brand, or a Space per audience type (internal vs. external screens).
Prerequisites
- Account Type: System Administrator.
- Before creating a Space, confirm which user accounts will publish content there (Publishers), which Categories should be available, and whether a custom color theme or article template should be the default.
- If you plan to apply custom Slide branding, prepare a logo image and the hex values for the foreground and background colors.
Procedure
Step 1 — Open Spaces
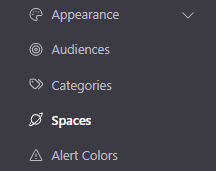
In the Settings left navigation, select Spaces.
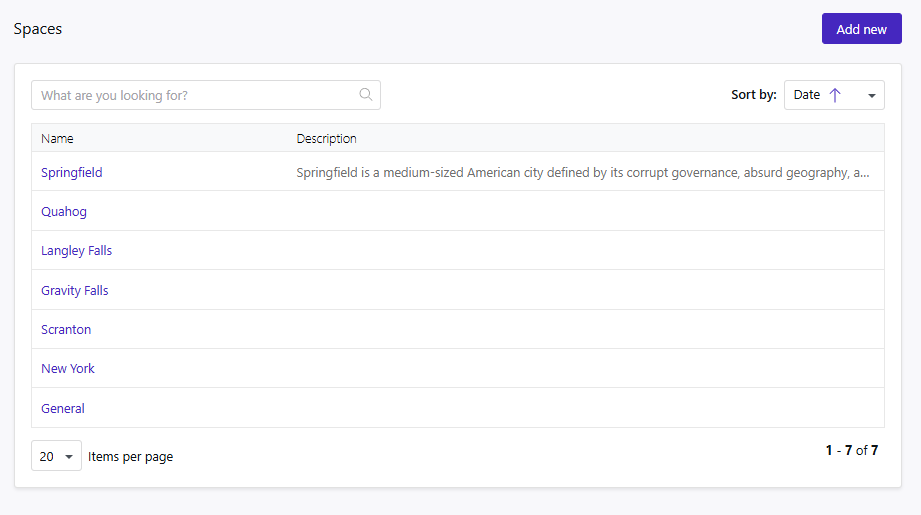
The Spaces list opens. Columns: Name (blue clickable links) and Description. Use the What are you looking for? search box to filter by name, and the Sort by dropdown to change sort order (default: Date).
Step 2 — Create a new Space
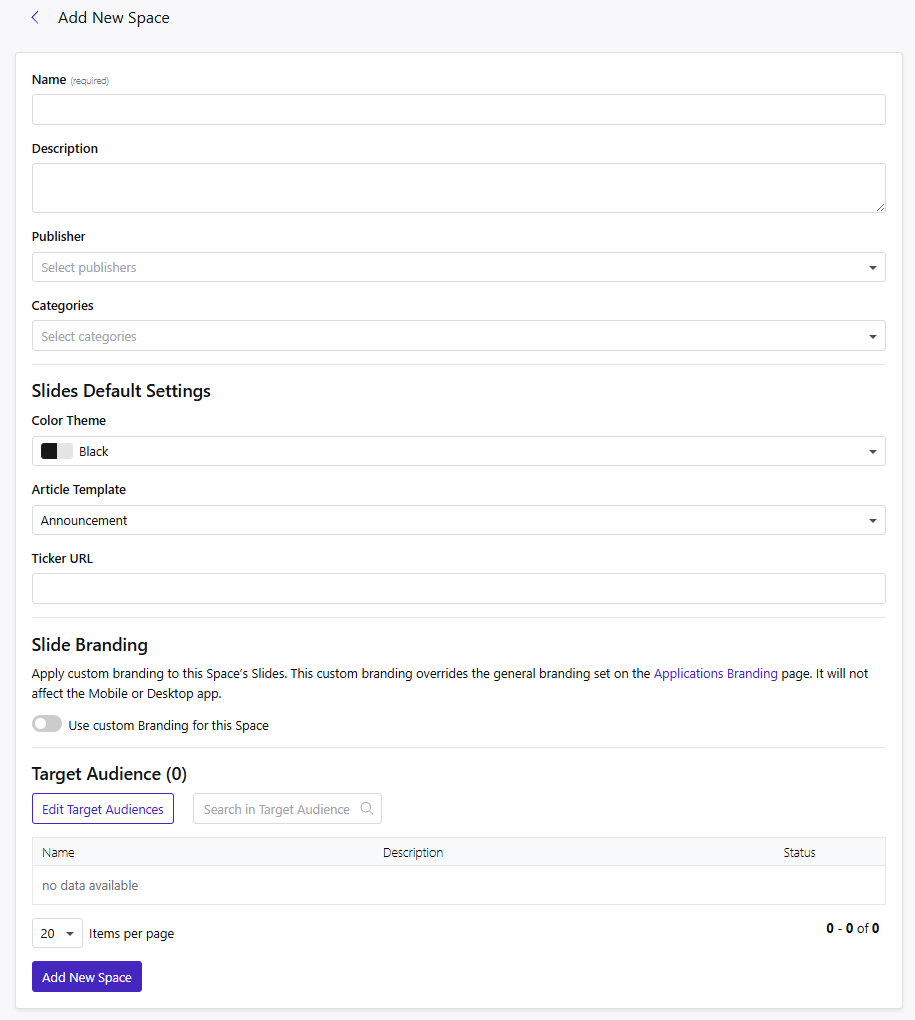
- Select Add new in the top-right. The Add New Space form opens.
- Fill in the basic fields:
Field Required Description Name Yes Unique display name for the Space (e.g., New York,HR,Factory Floor).Description No Optional note on the Space's purpose or scope — visible to Admins in the list. Publisher No Users who can publish content in this Space. Select one or more accounts from the dropdown. Categories No Categories available to Creators working in this Space. Leave empty to make all Categories available. - Under Slides Default Settings, configure the defaults that apply to new Slides created in this Space:
Field Description Color Theme The default color theme applied to new Slides. Creators can still override it per Slide. Article Template The default article template applied to new articles. Default: Announcement.Ticker URL Optional URL for a Ticker feed displayed in this Space. - Under Slide Branding, optionally apply custom branding to Slides in this Space (see Step 3).
- Under Target Audience, optionally assign Audiences to this Space (see Step 4).
- Select Add New Space to save.
Step 3 — Configure custom Slide Branding (optional)
By default, Slides in a Space use the global branding set at Settings → Appearance → App Branding. Custom Slide Branding lets you override that for this Space specifically. It does not affect the Mobile or Desktop app.
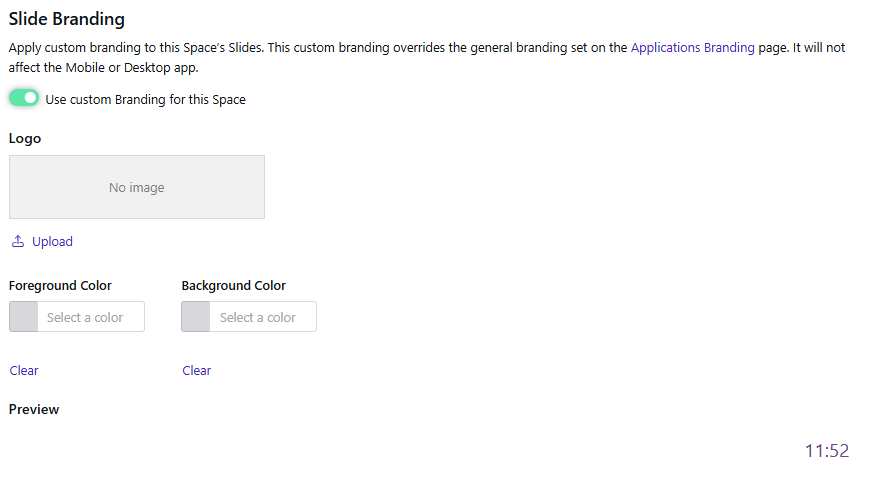
- In the Slide Branding section, enable the Use custom Branding for this Space toggle.
- Three fields appear:
Field Description Logo Upload a logo image to display on Slides in this Space. Select Upload to choose a file. Foreground Color The text and icon color for Slides in this Space. Enter a hex value or use the color picker. Background Color The background color for Slides in this Space. Enter a hex value or use the color picker. - Check the Preview to confirm the branding combination looks correct.
- Select Save changes (or Add New Space if creating).
Heads up: Custom Slide Branding only affects the slide display on Slide Players assigned to this Space. The Mobile and Desktop apps always use the global branding.
Step 4 — Assign Target Audiences
The Target Audience section lets you attach Audiences to a Space. Attached Audiences can then be used by Creators publishing content in this Space to target specific groups of users.
- In the Target Audience section, select Edit Target Audiences.
- The Audiences picker opens, listing all available Audiences with their Name, Description, and Status.
- Select the checkboxes next to the Audiences to assign, then confirm.
- The Target Audience (N) counter updates to reflect the number of attached Audiences.
- Select Save changes (or Add New Space if creating).
Step 5 — Edit an existing Space
Select a Space's name in the list (or hover the row and select the Edit icon) to open the Edit Space form.
All fields from Steps 2–4 are editable. Select Save changes when done.
Important: Removing a Publisher from a Space does not delete their previously published content. Removing a Category from a Space's scope does not untag existing content that uses that Category.
Step 6 — Delete a Space
Hover over a Space row and select the Delete icon.
Important: Deleting a Space is permanent. All content, Slide Players, and user assignments scoped to that Space must be migrated or cleaned up beforehand. There is no undo.
Verification
After creating or editing a Space, confirm the configuration is correct:
- Return to the Spaces list and verify the Space name and description appear as expected.
- As a Publisher assigned to the Space, confirm the Space appears in the Space selector when creating content.
- If custom Slide Branding was enabled, publish a test Slide in the Space and verify it displays the correct logo, foreground, and background colors on a Slide Player.